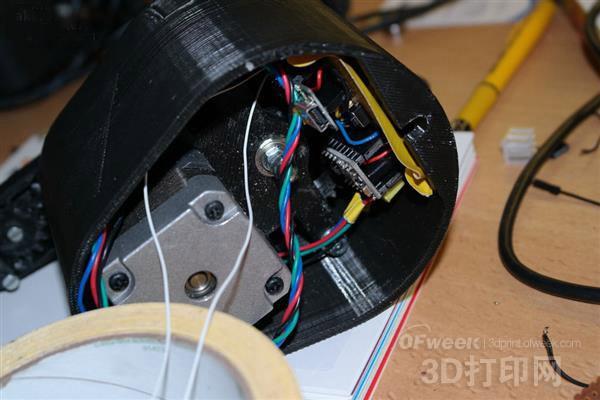
Recently, the full 3D printing clock designed by young Dutch designer Yvo de Haas - "hand-in-hand" is still unstoppable. This clock is called "hand in hand" because its minute hand is completely attached to the hour hand. The 22-year-old Yvo de Haas is a self-taught electronic wizard who especially likes to make everything with 3D printers . According to de Haas on his blog, "A lot of things have been lost recently because of moving, including a clock. Because I like strange things, buying an ordinary clock is not in my consideration. Before that, I DIY a lot of LED clocks. But now I want a mechanical one," he explained. In fact, Yvo is not entirely a whim, he has been brewing such a clock in his heart for a long time. "This clock mounts the minute hand at the end of the hour hand (you can also attach the second hand to the end of the minute hand). This is a clock that has never been seen before, but one of my old classmates introduced it to me five years ago. And three years ago I wanted to make such a clock," he explained. Fortunately, this ambitious designer is not too busy, put this very cool 3D print clock as an open source project on the web to share and write a tutorial for it. If you are interested in printing such a clock in 3D, you can click here to go to Yvo's blog to download all the STL files and code. According to Yvo, the most time-consuming part of making this clock is actually 3D printing, which has a total of 16 different 3D printing parts. "This is not a big project for me, but it still takes about 10 hours to print, depending on the type and setting parameters of the 3D printer. My print settings are 40% fill rate, and 0.4 mm Layer thickness," he explained. Although the 3D printing phase may be the most time consuming, it is definitely not the hardest, and assembly is the only one. Although you can find a complete list of all the necessary parts listed by Yvo in the Instructables tutorial, you will need a lot of things to complete the clock. These include: a stepper motor and stepper motor driver; an Arduino-compatible microcontroller with at least 5 I/O ports; a 9V or 12V power supply; an electrolytic capacitor; 3 resistors and a large number of bearings and nuts , screws and wires. Although in theory they should be fairly simple, you should follow the Yvo tutorial carefully when assembling. The same is true for electronic circuits, which can be a bit complicated for an inexperienced maker. "For a clocked microcontroller, you need something with five I/O ports and a built-in power conditioner. And you need to plan carefully because not all I/O responses are the same." Yvo explain. “In order to run the stepper motor, I used a StepStick A4988 stepper motor driver. There are two buttons on the clock for you to manually adjust the time up or down.†As for the circuit, Yvo uses a prototype board instead of a printed circuit board (PCB). Therefore, he does not have a clear design for sharing. “But if you follow the schematic, it should be easy to copy. The input voltage (9-12V) needs to be connected to the VIN or VBAT pin of the microcontroller. The 5V output is from the microcontroller.†Suggestions. †Then, with its settings, the hand-in-hand clock is still different in operation from the normal clock. It mainly relies on the code. The hand-in-hand clock does not actually record the time, but according to the constant interval of the (stepper motor) power, this interval does not necessarily coincide with the passage of time, but the accuracy is not a problem. . This is a very different clock that will be cool on any wall of any house. a others,High Quality others,others Details, CN Guangdong Puda Electrical Appliance Co., Ltd. , https://www.elecapoka.com.jpg)